Given the robust electronic features of today’s outboard motors, it is important to go back to basics and ensure
that you are using the best practices for maintaining and connecting the outboards you service.
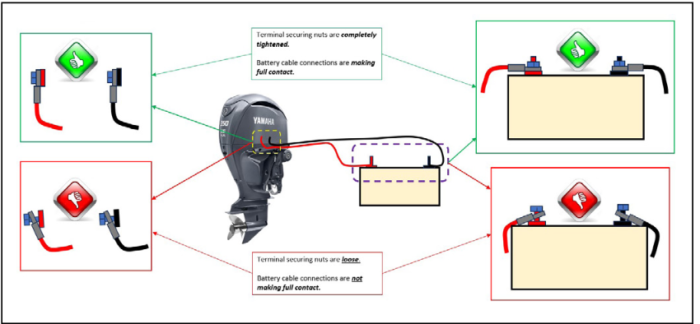
For example, when attaching a battery to the engine, always make sure that the battery connections are
completely secured. If there isn’t full contact in the connections, there can be excessive fluctuations in the
power supplied to the electrical components. This can result in possible component damage.
Another way to incorporate best practices into taking care of your outboard is to ensure that you are properly checking the
engine’s oil level.

This pressure difference can prevent oil from entering the bottom of the tube during initial oil filling, or after oil
level fluctuation events have occurred, such as during normal engine running or storage in the “tilt-up” position.
Therefore, it is necessary to “vent” the dipstick tube briefly by removing the dipstick completely to allow the
pressure to equalize before taking an oil level reading.
Either over-filling or under-filling the engine with oil can cause severe internal damage.
To help obtain correct engine oil levels, it is recommended to follow the below best-practice procedure:
1. Confirm the engine is level, both side to side and
front to back.
2. Fully remove the oil level dipstick and wipe it
clean. Wait a moment for the pressure in the
dipstick tube to equalize.
3. Insert and fully seat the dipstick.
4. Fully remove the dipstick and confirm the oil level
is within the upper and lower range indicators.
5. If required, adjust the oil level by adding or
removing engine oil.
NOTE: Repeat steps 2–5 until the proper oil level is
obtained.